Gift Vouchers for WooCommerce - WordPress Plugin
“Gift Vouchers for WooCommerce - WordPress Plugin” Documentation by “World Web Technology”Introduction
Gift Vouchers for WooCommerce Introducing the Gift Vouchers for WooCommerce plugin by World Web Technology, an exceptional tool for creating personalized PDF vouchers. Seamlessly connect your online store with your physical business and effortlessly sell vouchers as store credit, which can be redeemed both in-store and online. This plugin is ideal for businesses that offer goods or services at a later date or in-person, allowing you to utilize vouchers for pre-paid admission, event tickets, gift certificates, or free gift redemption. Enhance the gifting experience by personalizing vouchers with recipient names and messages, making them wonderful presents for friends and family. Take advantage of the opportunity to design and customize vouchers to align with your brand, effectively bridging the gap between your online and offline operations. Experience a revolutionized customer journey with the PDF Product Vouchers plugin provided by World Web Technology..
Features
- Design voucher templates using a user-friendly "what you see is what you get" editor.
- Pre-set voucher backgrounds, or upload your own designs.
- Personalize vouchers by adding product details, such as SKU, to suit your preferences.
- Manage vouchers from the list and mark them as redeemed when necessary.
- Manually create vouchers for customers to provide store credit as gifts.
- Enable customers to personalize vouchers by including recipient names, messages and many more options.
- Customize and offer downloadable gift vouchers for products or services.
- Enable customers to automatically send gift vouchers to friends via recipient email.
- Optionally offer alternative voucher background images for customers to select their desired design.
- Sell vouchers that can be later redeemed in your online store.
- Support partial redemptions and allow multiple redemptions per voucher.
- Void a voucher to prevent further redemptions.
- Access a comprehensive list of all generated vouchers or search by voucher number to locate a specific customer's voucher.
- Generate printable gift certificates with variable amounts using the Name Your Price extension.
Best Used For
- Individuals who own e-commerce stores,
- Professionals in the field of marketing,
- Startups and small businesses,
- Online retailers,
- Any website that facilitates online shopping.
Plugin Install
- Installing the plugin is similar to installing any other WordPress plugin. Start by logging into your WordPress site and navigating to Plugins > Add New.
- On the Install Plugins page, click on the Upload option in the top navigation, and then select Browse.
- Locate the downloaded plugin zip file on your computer and upload it. Remember to unzip the file first to access the plugin zip file.
- Click on Install Now.
- Wait for WordPress to finish uploading the file. Once done, click on Activate Plugin.
- You should now see a message at the top of the window indicating that the plugin has been activated.
The Plugin Settings
After successfully activating the plugin you can hover over on woocommerce option (see below image) you can see 2 options which are 1.Gift Vouchers 2. Gift voucher templates.

After clicking on "Gift Vouchers," you will see a list of gift vouchers. You can create new gift vouchers or edit existing gift vouchers here.

To generate gift vouchers, you first need to create a gift voucher template. To create a gift voucher template, hover over the "WooCommerce" option. You will see two options. From these options, select "Gift Voucher Templates." This will open the gift voucher template page. All the gift voucher templates that you have created will be displayed here.

Step-by-step guide:
If you do not have a voucher template design, do not worry. We have provided some sample formats that you can use to make your template look good. To download the sample format, click on the "Click here" button shown in the image below. button with the text "Click here".

After downloading the sample template, click on "Add gift voucher template."
This will open a gift voucher template customization window in front of you. It is similar to the website customization window. Here, you can design the template according to your needs. For example, you can modify here to show the brand logo, product name, recipient name, recipient email, product price, voucher number, expiry date, message and many more option.

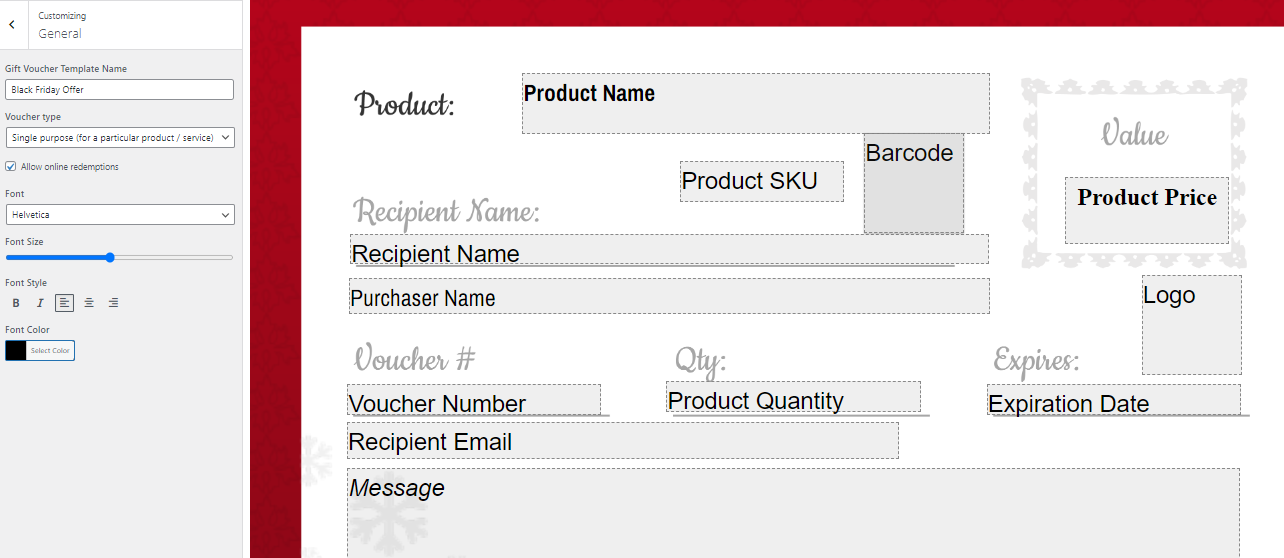
1. General
In this space, you can input the name of the template and select the type of voucher (single or multiple purpose). If you choose "single," the voucher coupon will be limited to a specific product. If you select "multi-purpose," it can be used for any products. You can also indicate whether online redemption is allowed by checking the "Allow online redemptions" field. Choose the desired font family, font size, font style, and font color.
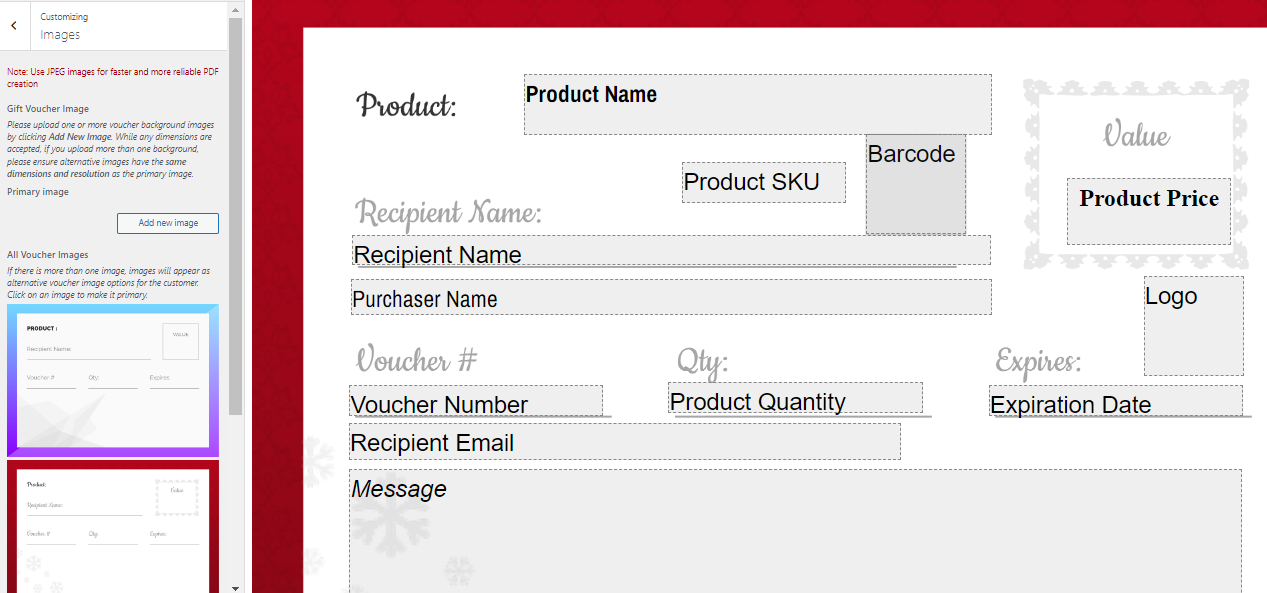
2. Images :
- Upload one or multiple background images for the gift voucher by clicking "Add New Image." If you upload more than one background image, make sure that the alternative images have the same dimensions and resolution as the primary image.
- You have the option to either add your own custom gift voucher image or choose from our default template designs, as discussed in the initial step.
- If there are multiple voucher images, they will be displayed as alternative options for the customer. Click on an image to set it as the primary voucher image.
- Image DPI: Specify the DPI or resolution at which the voucher background was created. This affects the resolution at which voucher fields are added, so the value should match the image file.
- Additional Image: You may include an optional image with the same dimensions as the primary voucher image, which will be added as a second page to the voucher. This can be useful for including terms or redemption instructions.
Image size criteria: Minimum width : 3000 | Maximum width : 3500 | Minimum height : 1300 | Maximum height : 2500Note: It is recommended to use JPEG images for faster and more reliable PDF creation.
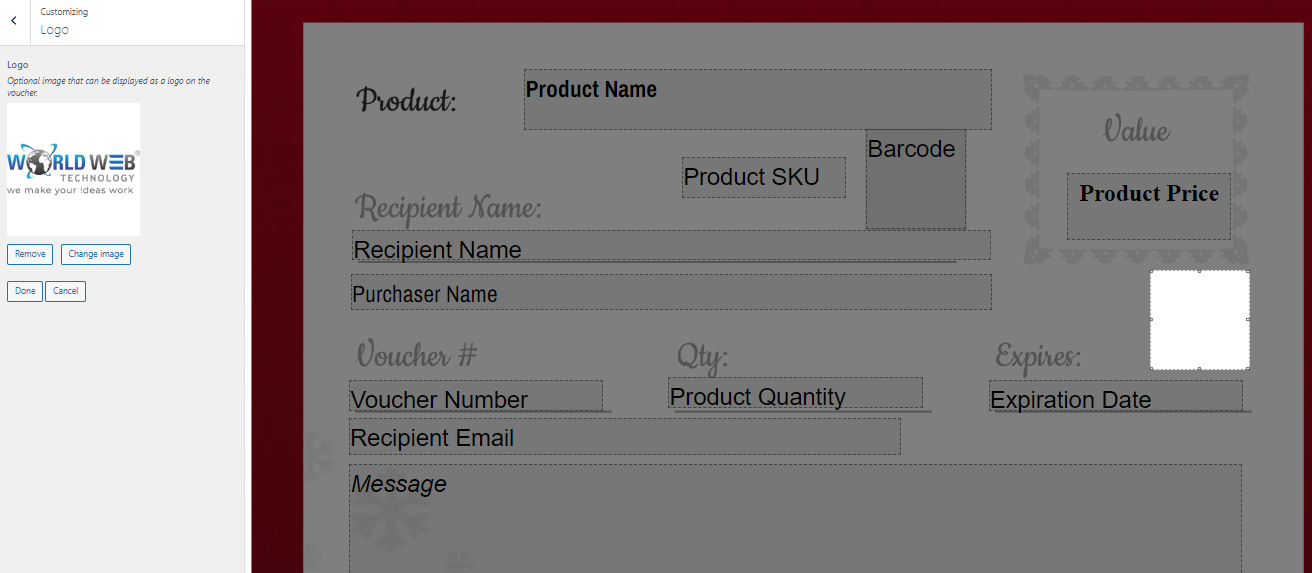
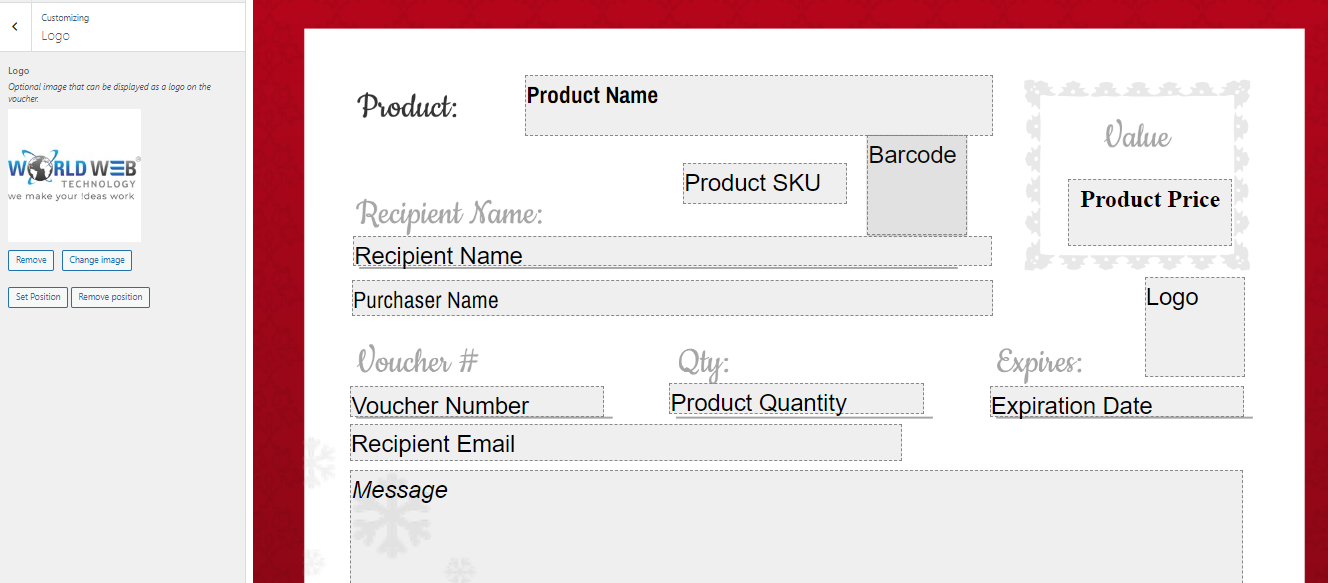
3. Logo
You have the option to include an logo on the voucher. You can modify the logo image, adjust its position on the voucher template, or remove it altogether.
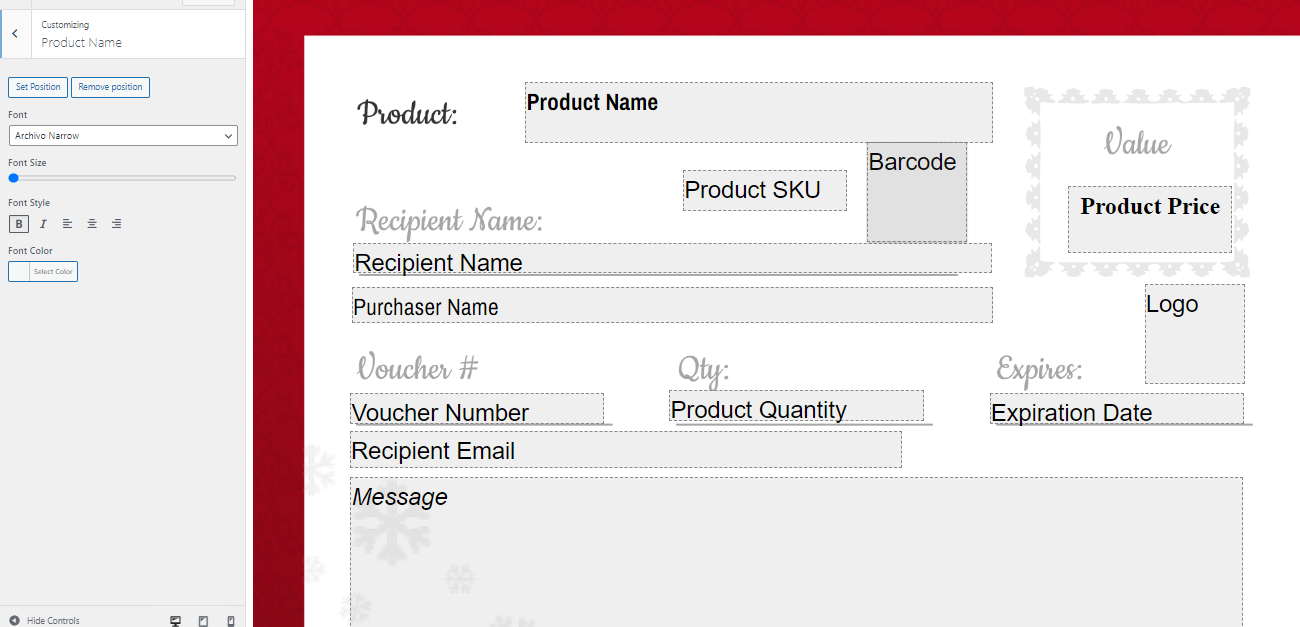
4. Product Name
You have the ability to customize the appearance of the product name by selecting a font family, adjusting the font size, choosing a font style, and setting the font color. Additionally, you can position the product name on the template and also remove its placement if desired.
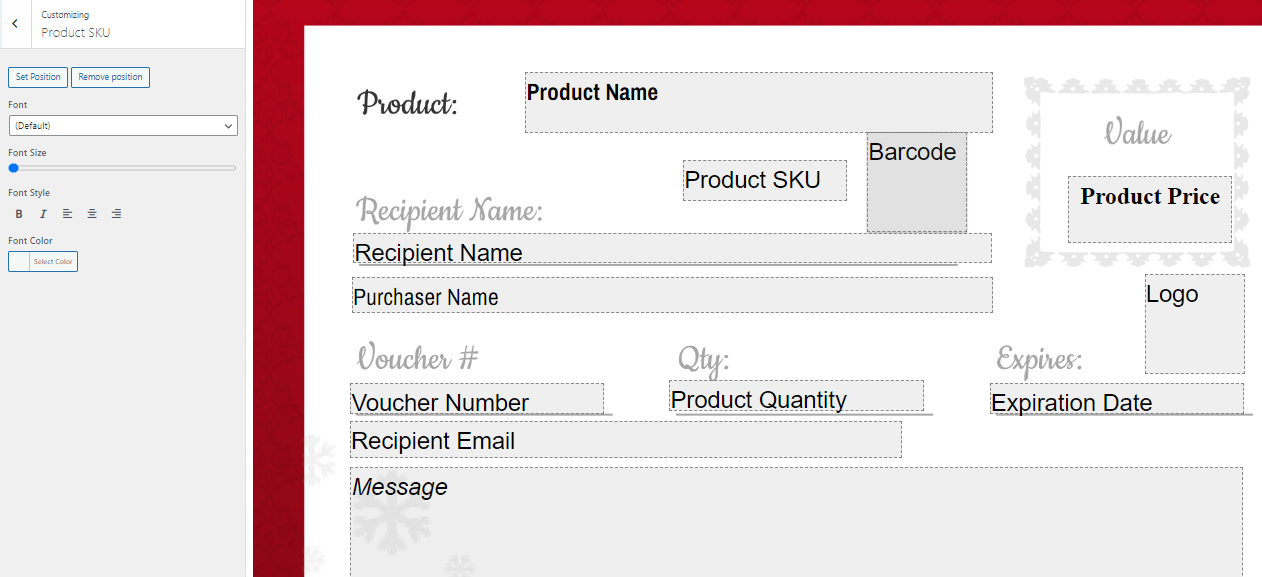
5. Product SKU
You have the option to customize the appearance of the Product SKU by selecting the font family, adjusting the font size, choosing a font style, and specifying the font color. Additionally, you can easily set or remove the position of the SKU on the template.
6.Product Price
You have the ability to customize the appearance of the Product Price by adjusting various elements such as font family, font size, font style, and font color. Additionally, you can manipulate the position of the price on the template by setting or removing it.

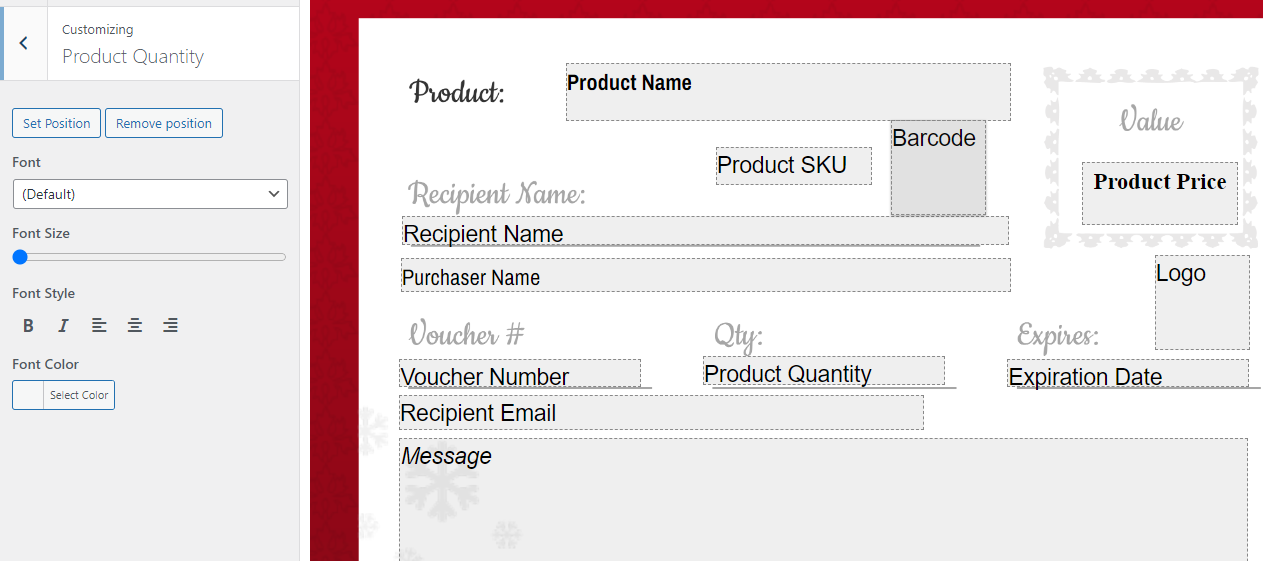
7.Product Quantity
You have the ability to customize the appearance of the Product Quantity by adjusting the font family, font size, font style, and font color. Additionally, you can easily set or remove the position on the template.
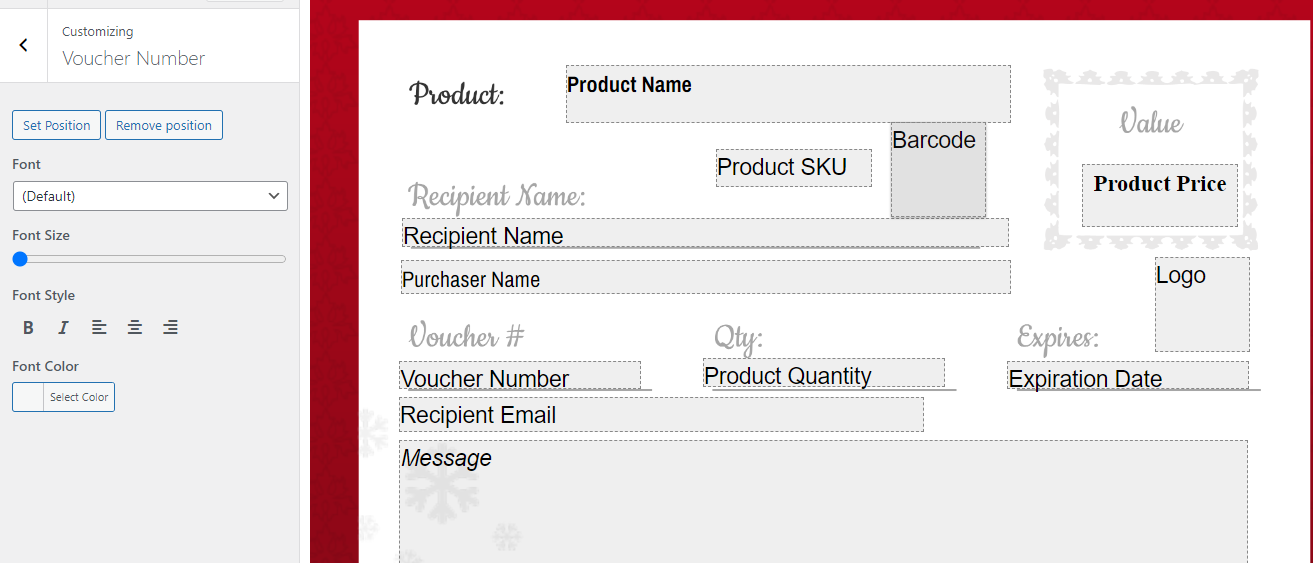
8. Voucher Number
You can style Voucher Number by using font family, font size, font style and font colour and also you can set and remove position on template.
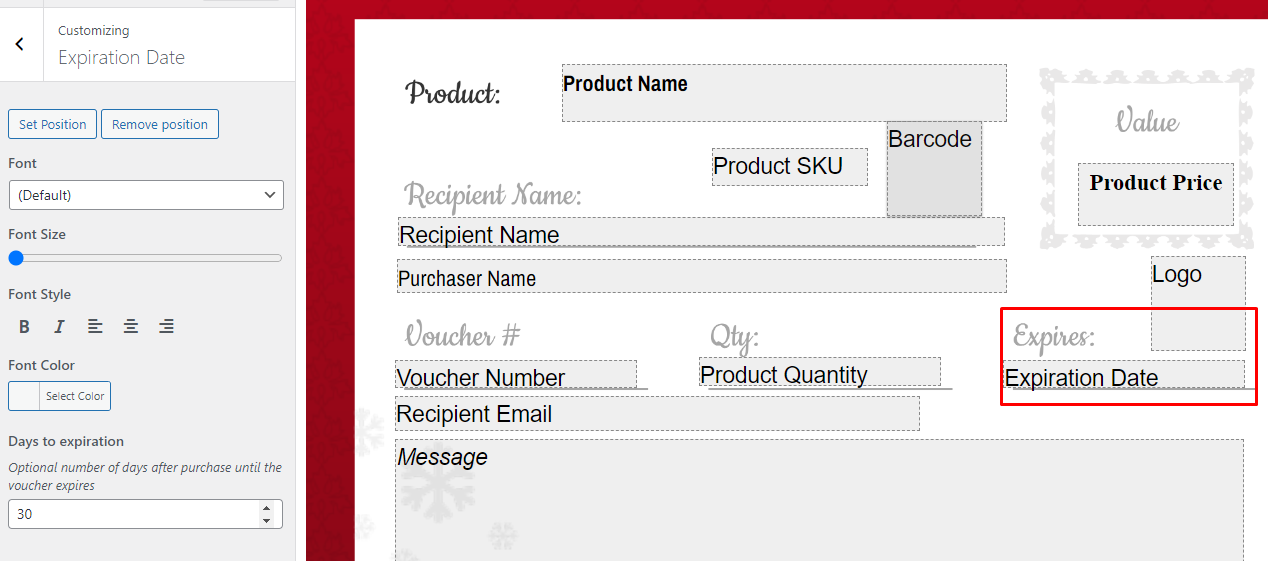
9.Expiration Date
You can style Voucher Number by using font family, font size, font style and font colour and also you can set and remove position on template Days to expiration: Optional number of days after purchase until the voucher expires.
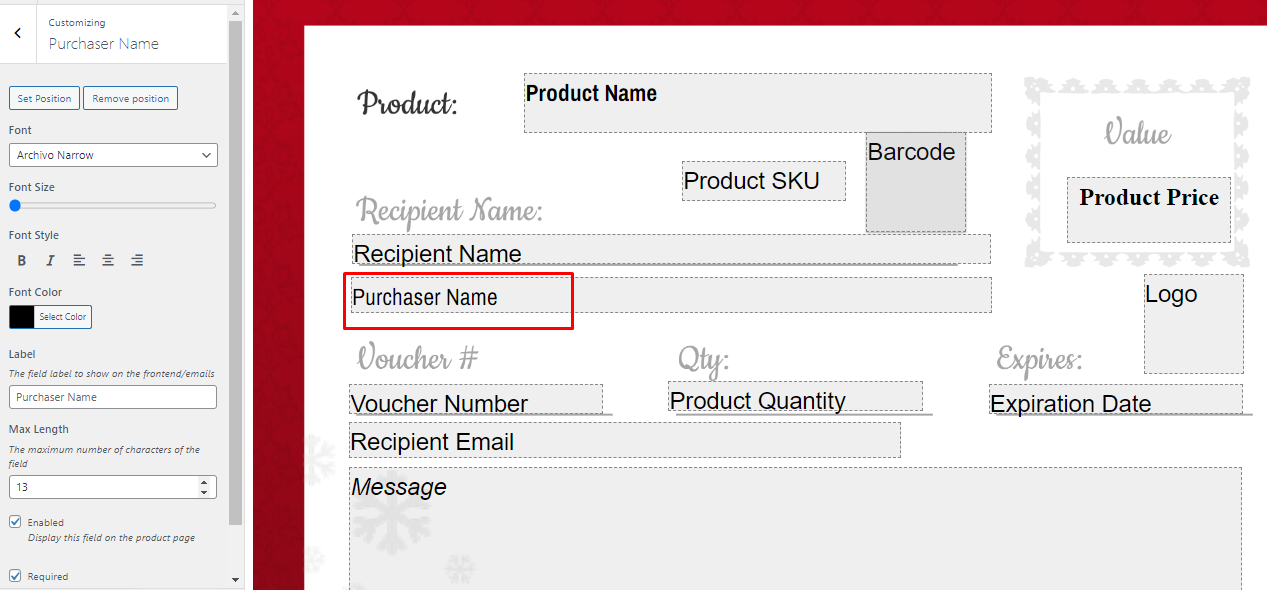
10. Purchaser Name
The name of the individual or organization purchasing the voucher is referred
to as the
voucher purchaser name. This name is typically displayed on the voucher header, along
with other details such as the voucher number, date, and amount. Identifying the voucher
purchaser name is crucial for purposes of tracking and accounting, as it allows for
determining who is responsible for the payment.
You have the option to customize the appearance of the Purchaser Name field by
selecting
the font family, font size, font style, and font color. Additionally, you can specify
the position of the field on the template label. The field label refers to the text that
is shown on the front-end and in emails. You can set any desired label, and if you don't
provide one, the default label for the purchaser name will be displayed. Furthermore,
you can set the maximum length of characters for the field
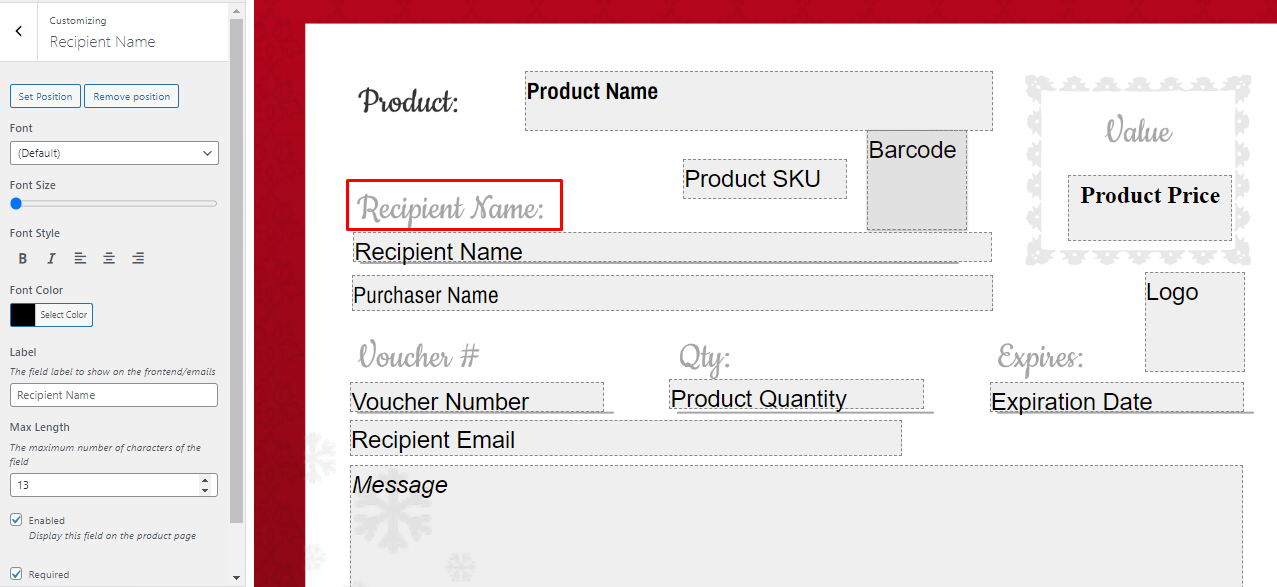
11. Recipient name
The recipient name on the gift voucher refers to the person who will receive
it. This
name is usually indicated on the voucher itself, along with additional details like the
voucher amount, expiration date, and the merchant where it can be redeemed. The
recipient name is significant for tracking and accounting purposes as it helps identify
the intended recipient of the gift voucher.
You have the option to customize the
appearance of the recipient name by choosing the font family, font size, font style, and
font color. Additionally, you can specify the
position of the recipient name on the template label. The field label represents the
label that will be displayed on the frontend and in emails.
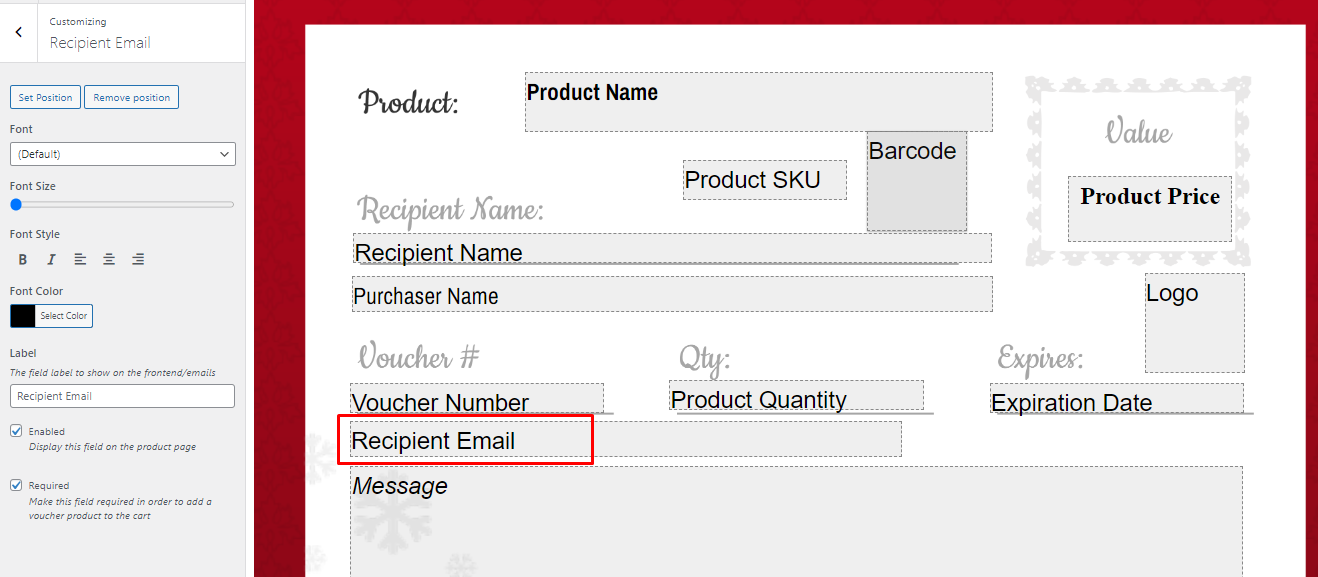
12. Recipient Email
A gift voucher recipient email refers to the email that is sent to the person receiving
a gift voucher. You have the ability to customize the appearance of the recipient email
by selecting the font family, font size, font style, and font color. Additionally, you
can determine the position of the recipient email on the template by choosing whether to
set or remove it.
Regarding functionality, you can enable or disable the recipient email field on the
product page. If you choose to enable it, the field will be displayed for customers to
provide their email address when adding a voucher product to their cart. The "Required"
option allows you to make the recipient email field mandatory for validation purposes,
ensuring that customers must provide their email address in order to successfully add a
voucher product to their cart.
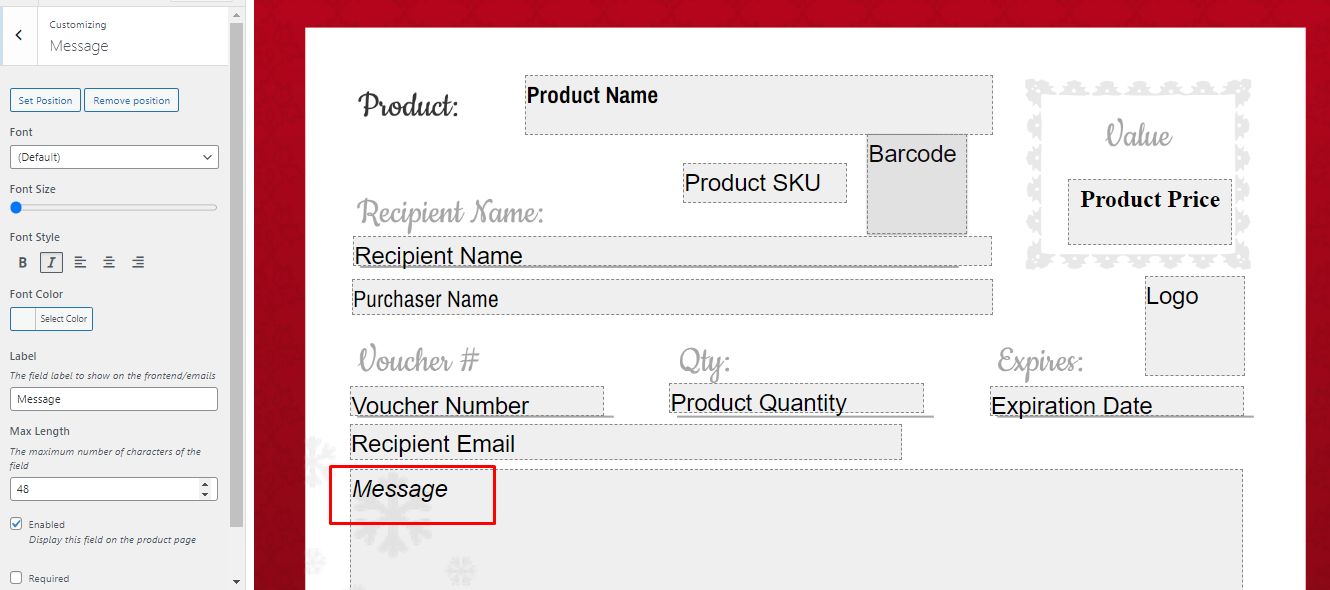
13. Message
The voucher recipient message by purchaser name is a personalized message that the person purchasing the voucher can write to the recipient. This message is usually included on the voucher and can range from a basic greeting to a heartfelt expression. The "Max Length" refers to the maximum number of characters allowed in the message field. By enabling the field, you can choose to display it on the product page. The "Required" option allows you to make the message field mandatory for validation when adding a voucher product to the cart.
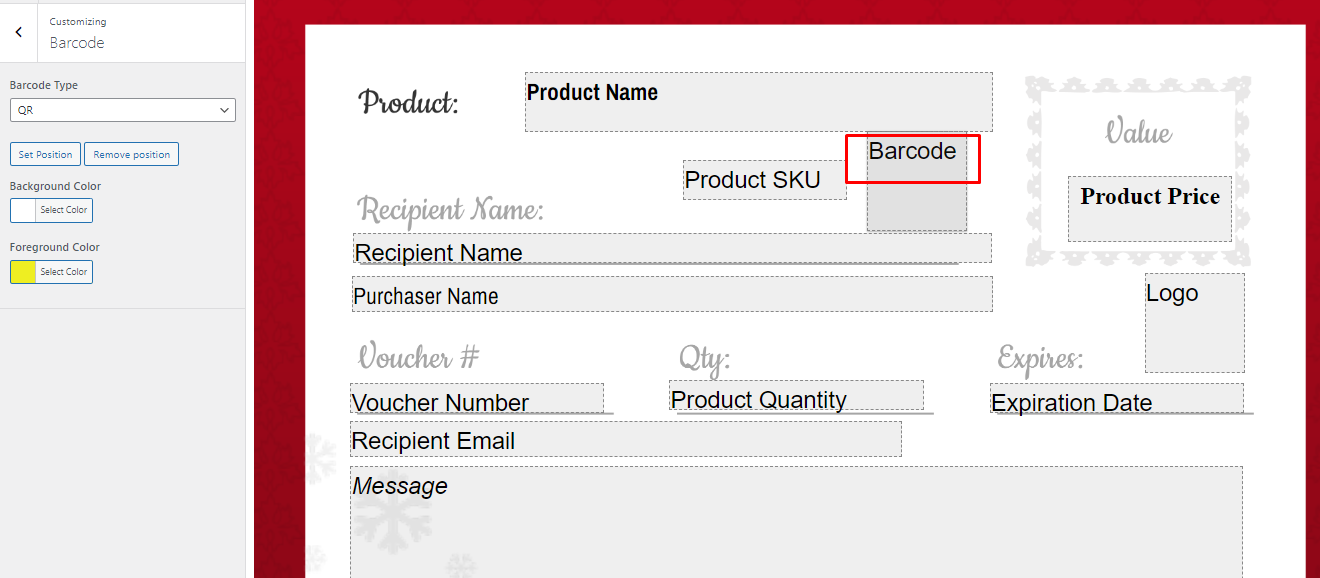
14. Barcode
The recipient voucher barcode serves as a distinctive code that is utilized for tracking
and redeeming a voucher. This barcode is commonly printed on the voucher and can be
scanned by a retailer or merchant to verify the voucher's validity and redeem its value.
Regarding the "Barcode Type" option, you have the ability to choose the type of barcode
from a drop-down list.
At the moment, we support the following choices: QR code and Data matrix
some other barcode such as Code 39 ,Code 128, and Code 93 barcode types offer different
formats and functionalities. It's worth mentioning that we have plans to include
additional barcode types in future updates, expanding the available options.
Now, let's go through each option step-by-step to ensure your template appears visually
appealing and meets your desired specifications.
Here are some benefits of using different barcode types:
- QR code: QR codes are widely recognized and preferred barcodes. They are user-friendly and capable of storing extensive amounts of data. (Supported)
- Data Matrix: Data Matrix is a two-dimensional barcode that surpasses traditional barcodes in terms of data storage capacity. (Supported)
You have the option to customize the appearance of barcodes by selecting Background Color and Foreground Color. Additionally, you can specify the position of the barcode on the template. Once you have made the desired modifications, simply click on the "Publish" button to save your template design.
What are gift vouchers and how to create?
You can generate gift vouchers either in admin side or frontend side
- When a voucher is purchased, it is generated for the customer and added to the
"Vouchers"
Gift vouchers list (see below image) in the WooCommerce admin area. This list shows the
voucher title, date, voucher number, expires date, redeemable products and remaining
value
and actions. You can search this list by fields such as voucher number, to quickly find
the
voucher you need. You can also use the quick actions to view, void and download.
By clicking on view You can edit voucher details, download gift voucher PDFs, you can cancel voucher code by selecting “void” or modify other voucher information.

How to create gift vouchers - Admin side
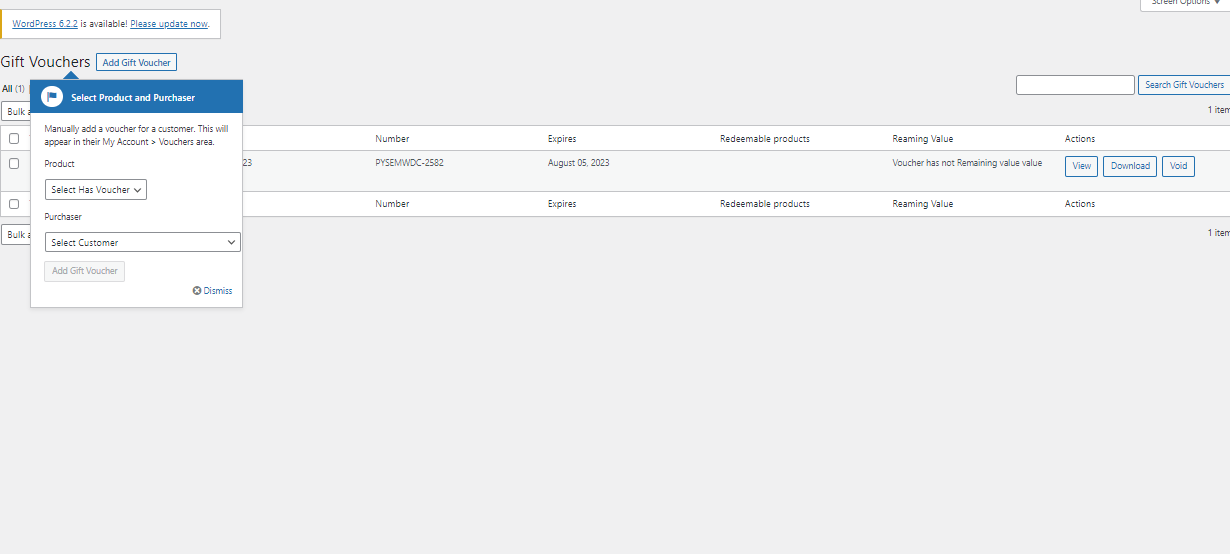
Creating a Gift Voucher Once you have created a gift voucher template, you can manually add a voucher for a customer from the admin side. (See below image)
To manually and front-side generate a voucher for a customer: 1. Create a new simple or variable product and enable the "Has Gift Voucher Option" setting in the product data tab. 2. Select the gift voucher template that you created earlier. 3. Publish or update the product. (See below image)
For simple product
For variable product

To generate gift vouchers from the admin side: 1. Go to WooCommerce > Gift Vouchers. 2. Click on the Add Gift Voucher button. 3. Select the product that you want to use for the voucher. 4. Enter the purchaser's name. 5. Click on the Add Gift Voucher button. The voucher will be added to the Gift Vouchers table. You can view, edit, or download the voucher from this table. Voucher Details: The Gift Vouchers table shows the following details for each voucher
- Title: The title of the voucher.
- Date: The date the voucher was created.
- Number: The voucher number.
- Expiry Date: The date the voucher expires.
- Redeemable Products: The products that the voucher can be redeemed for.
- Remaining Value: The remaining value of the voucher.
- Actions: The actions that you can perform on the voucher, such as downloading, voiding, viewing, or editing.
Front side demo
Front side generate voucher
Front Side : Customers can also generate and redeem gift vouchers. To generate gift vouchers from the front side, follow these steps: If the site owner or admin has enabled the "Has Gift Voucher" option, customers can enter the following information: Purchaser name Recipient name Recipient email Message (optional) Choose a voucher template design and click Add to cart.

If you have a coupon code, enter it on the cart page. Otherwise, proceed to checkout. After you have successfully placed your order, check your inbox for an order completion email with the gift voucher PDF. Using Gift Vouchers
Gift Vouchers Pdf preview

Once you have received a gift voucher, you can use it in your next purchase. To do this, simply enter the voucher code at checkout. The voucher amount will be deducted from your order total.

To download gift vouchers, go to My Account > Gift Vouchers
You can see all of your vouchers displayed here
You can easily download the PDFs from here
Have a look at demo
You can view a demo from here:
Gift Vouchers for WooCommerce
Youtube demo
By: World Web Technology
Email: help.worldweb@gmail.com